Wallet tutorials · 8 MIN READ
From a new wallet to your first Safex coins
Create a wallet, save a backup, claim starter coins, and watch the real payments arrive—from Mempool to History.
 Daniel Dabek · September 27, 2026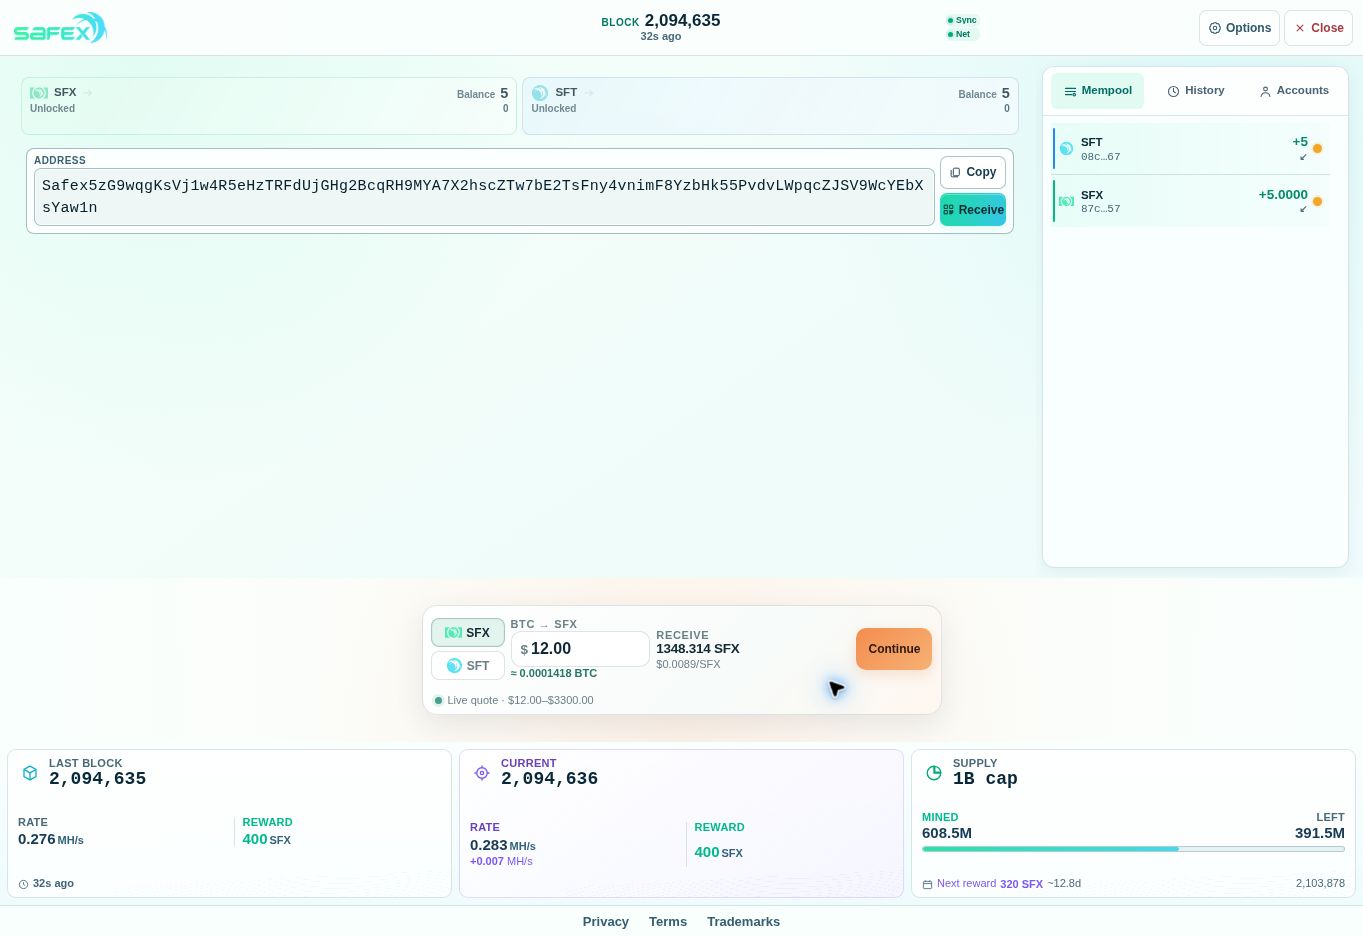
Let’s go from an empty wallet to your first Safex coins. You do not need to buy anything for this walkthrough. You will create a wallet at safex.org, save a recovery method, and use the starter faucet on this site.
The screenshots follow a real claim for 5 Safex Cash (SFX) and 5 Safex Token (SFT) on September 27, 2026. You will see the submitted claim, both incoming payments waiting in Mempool, and the same payments recorded in History. Your address will be different: always copy from your own wallet.
1. Create your wallet
Open safex.org and check the spelling in the address bar. Select Create wallet. If you already have a wallet backup, use Restore wallet instead—creating a new wallet will not recover an old balance.
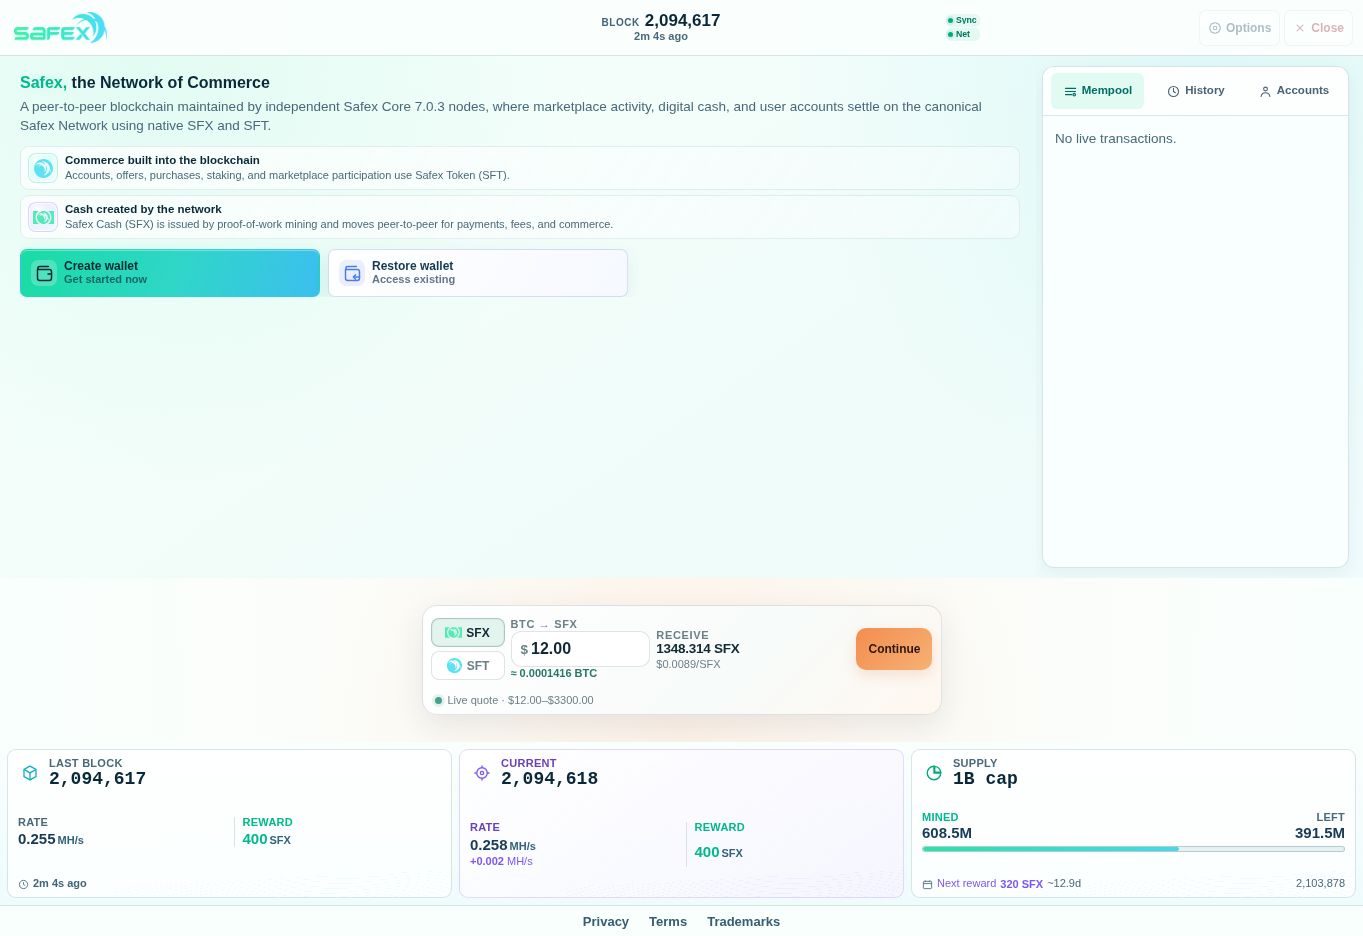
Read the Privacy Notice and Terms of Use & Risk Disclosure. If you agree, tick the acknowledgement and select Create wallet in the dialogue. When you see Wallet created, choose Continue to backup.
A wallet gives you a public address, which you share to receive coins, and private recovery information, which lets you reopen and control it. The same public Safex address receives both SFX and SFT. Their balances are displayed separately.
2. Save your way back before adding coins
The Secure recovery access screen offers four recovery methods. You need at least one usable method saved outside the current browser tab. Simply viewing a method does not mean you have saved it.
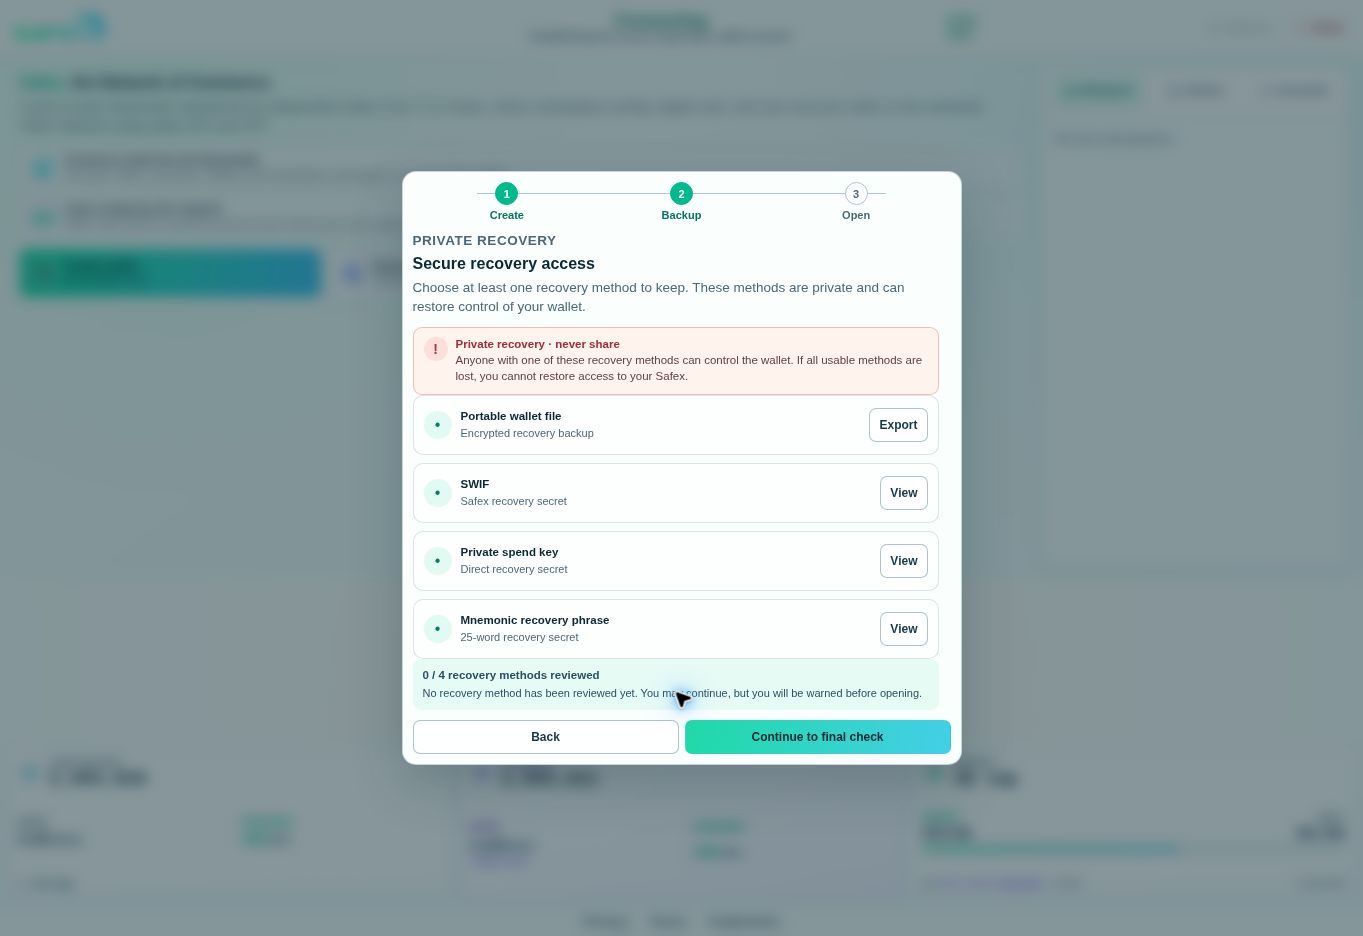
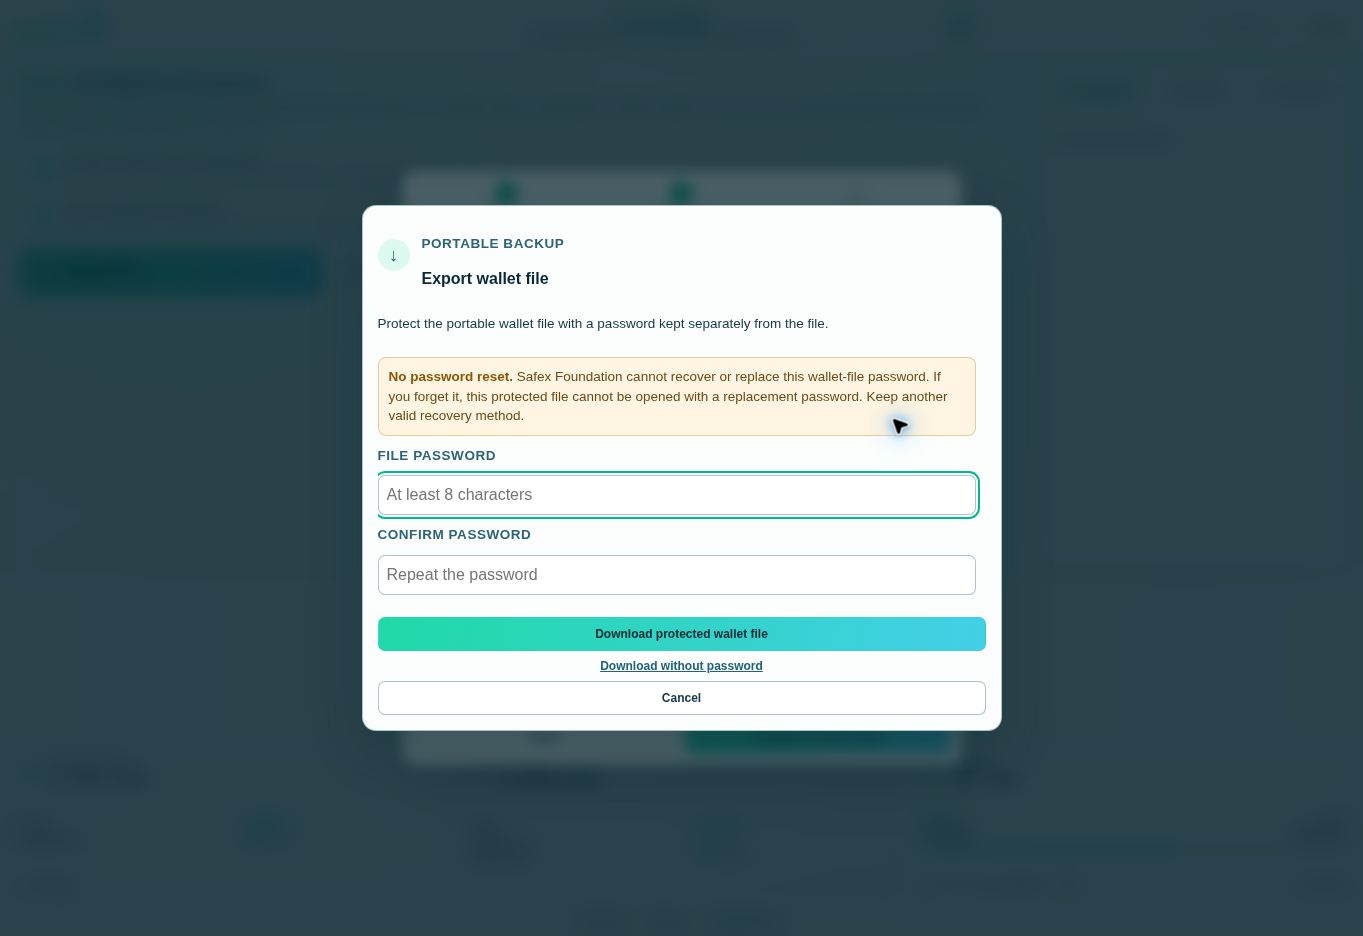
For a familiar starting point, choose Export beside Portable wallet file. Enter a strong password in File password and Confirm password, then select Download protected wallet file. Check that the download finished and that you can find the .safexwallet.json file. Keep its password safely and separately. Safex cannot reset that file’s password.
Another option is SWIF, a Safex recovery secret. In this demonstration, we saved the test wallet’s SWIF and later verified that it restored the same wallet. If you choose Mnemonic recovery phrase, save all 25 words in their original order. Keep any recovery secret private; never paste it into the faucet or include it in a screenshot.
After saving your recovery method, select Continue to final check, read the recovery acknowledgement, and choose Open wallet. Let synchronization finish. Synchronization means the wallet is catching up with the network’s records.
3. Copy your own receiving address
The opened wallet shows separate SFX and SFT balances, your address, and Copy and Receive controls. Our wallet started with zero of both assets.
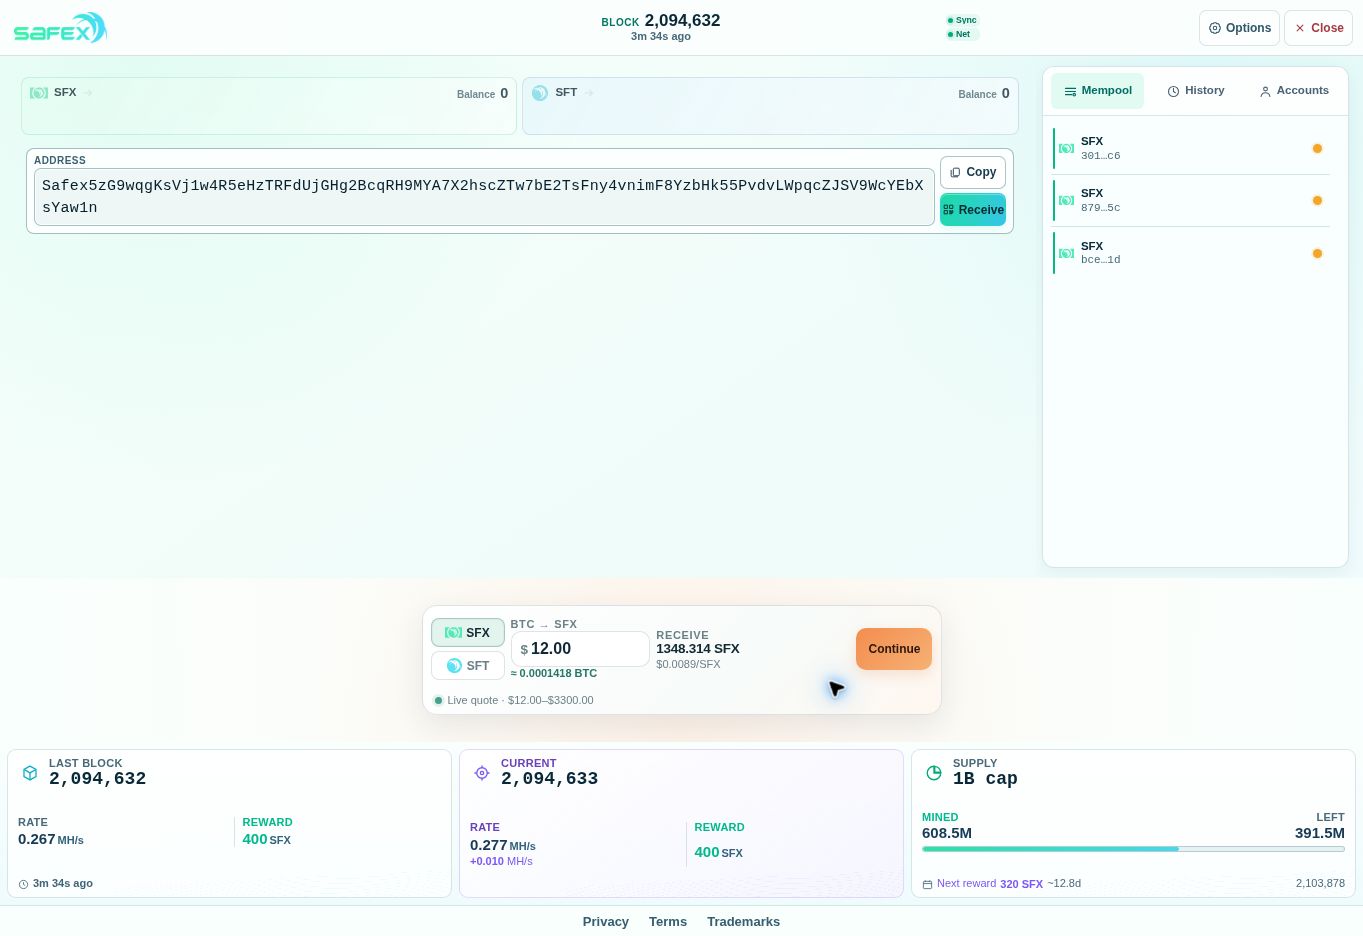
Select Copy beside your address. This is the information the faucet needs. Your SWIF, recovery words, private keys, and backup password are not receiving addresses. Keep the wallet tab open.
4. Submit one starter-coin claim
Open the starter faucet in another tab. Paste your address into Your Safex wallet address under Claim your starter coins. Compare the beginning and end with the address in your wallet.
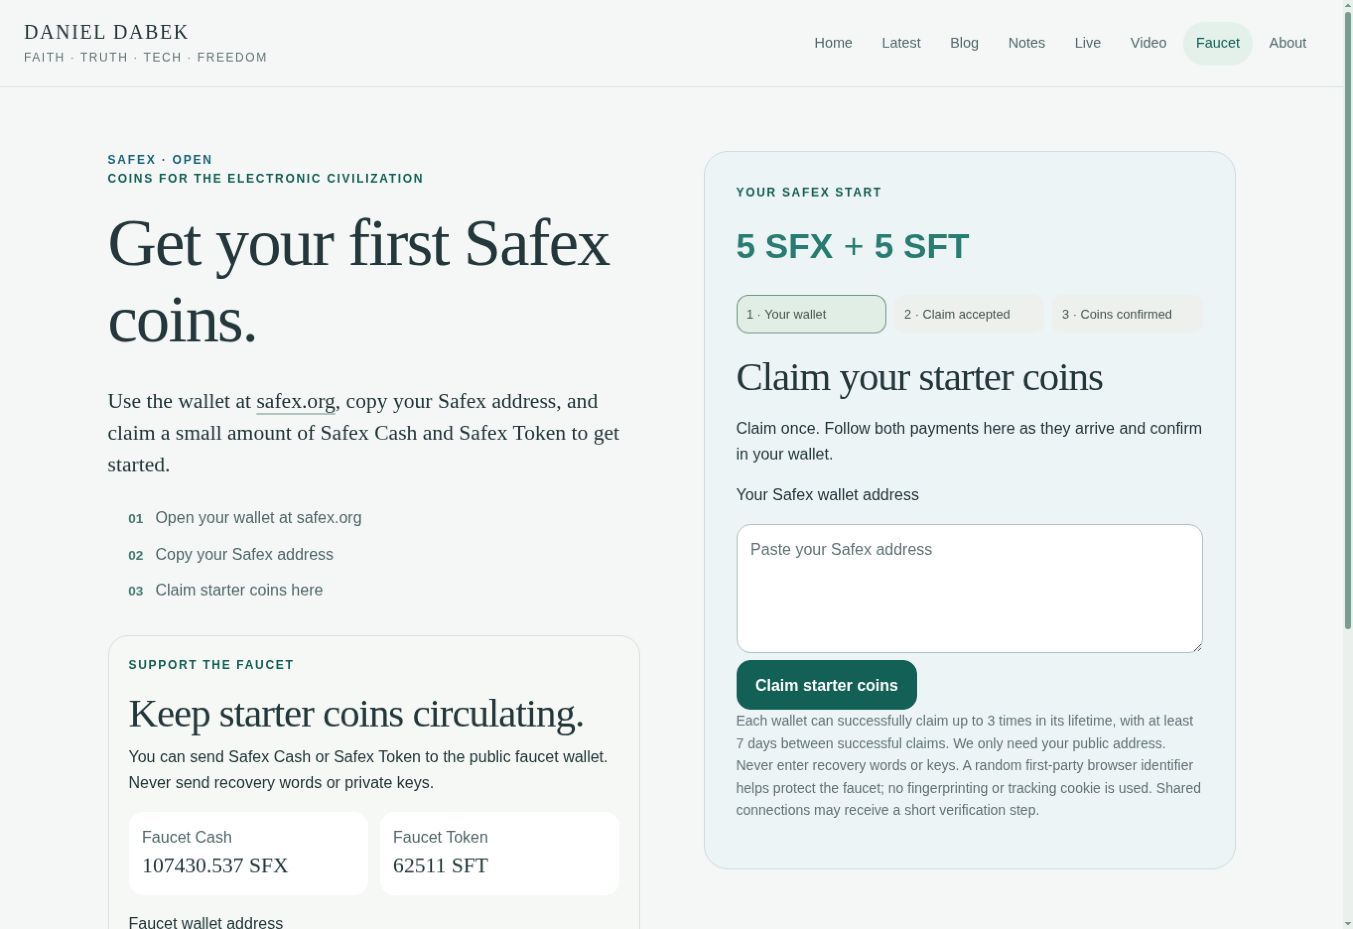
Use the claim form on the right. The Support the faucet section on the left is for donations and displays the faucet’s own address. Do not use that address—or an address copied from a tutorial screenshot—as your receiving address.
Read the live offer and availability. Our claim offered 5 SFX + 5 SFT. At the time of this walkthrough, the faucet allowed 3 successful lifetime claims per wallet, with at least 7 days between successful claims. Check the current terms shown beside the form.
Select Claim starter coins once. Keep the page open and follow the result. For our real claim, the page reported Both payments have been sent and displayed a separate transaction ID for each asset.
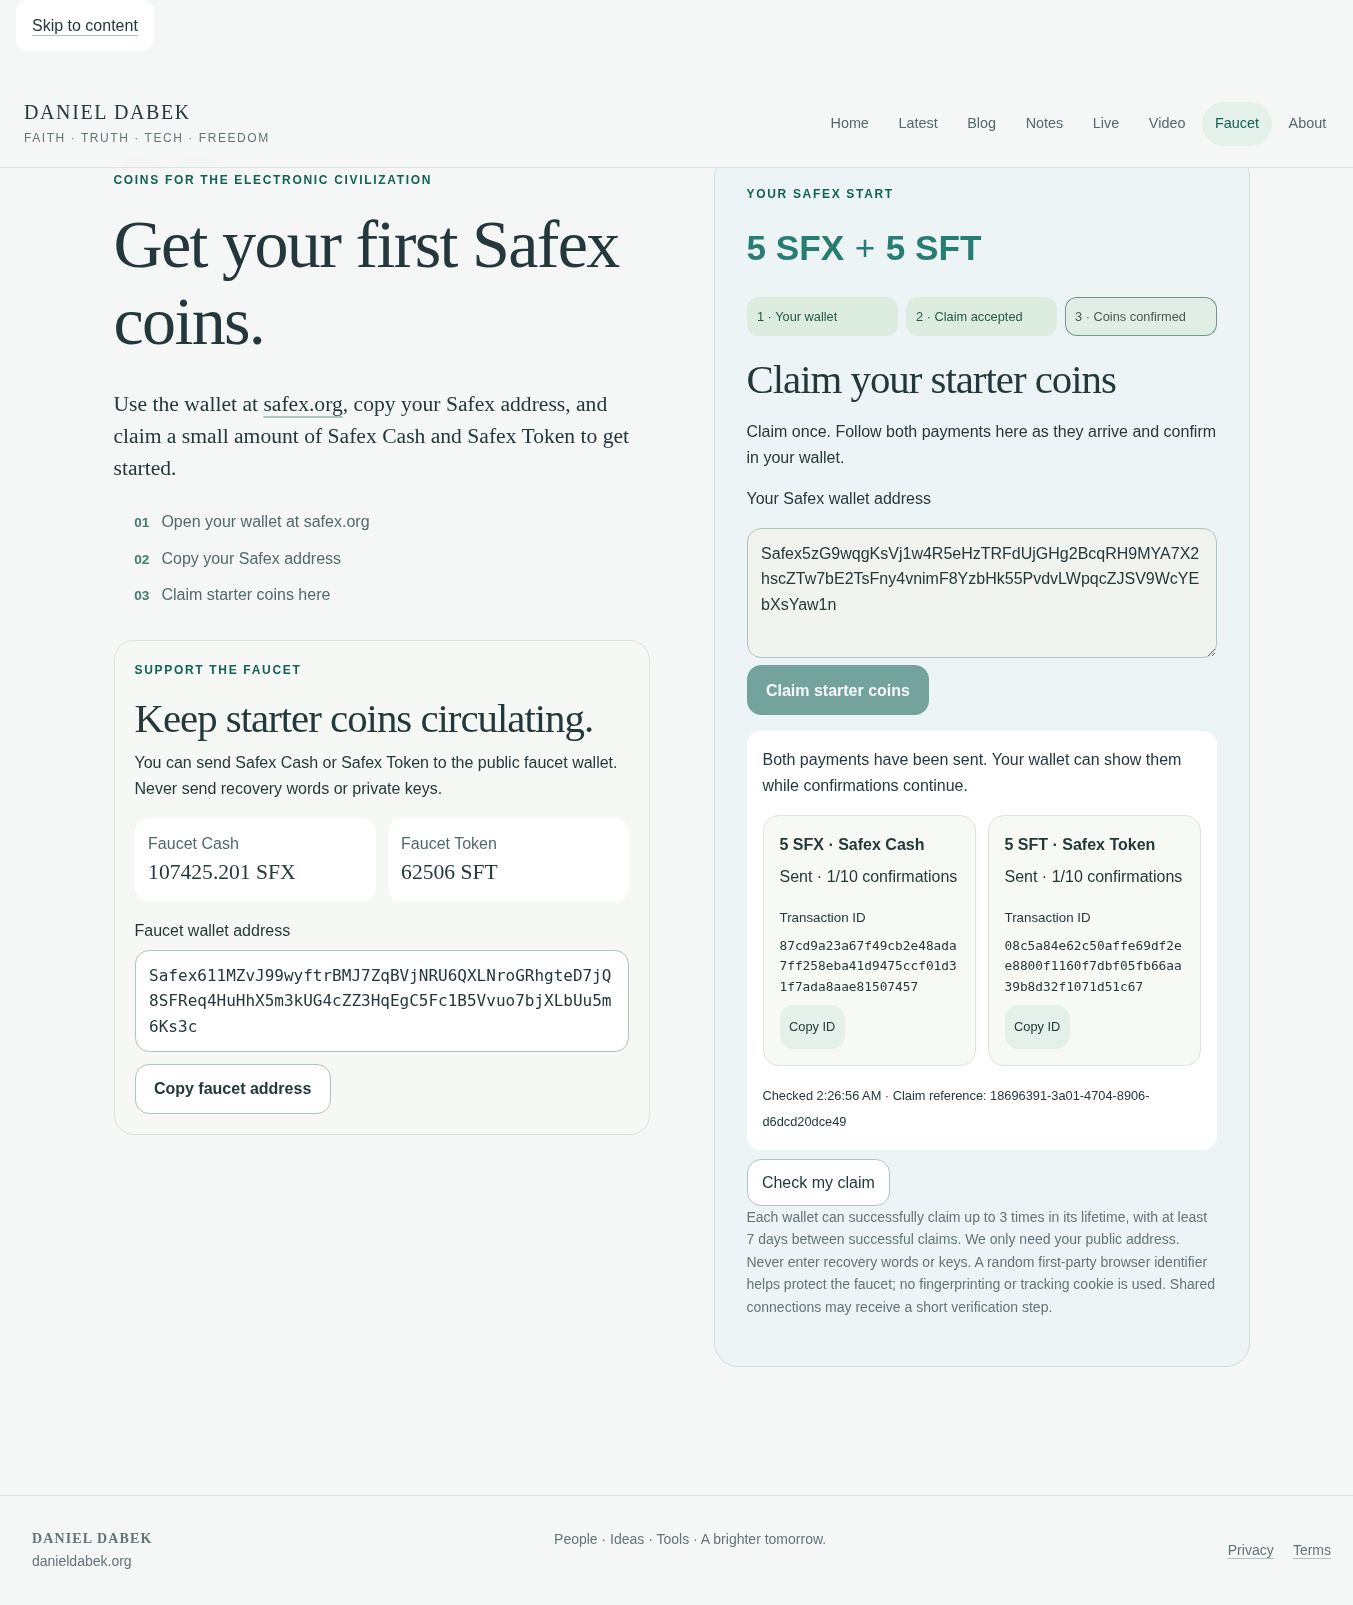
A transaction ID is the reference for one particular payment. Save the claim reference and both IDs if you need to check the result later. Acceptance or submission is an early stage; it does not mean every confirmation has finished.
5. Watch the incoming coins in Mempool
Switch back to the wallet and select Mempool in the activity panel. Think of it as a waiting area for transactions that have been seen by the network but have not yet been included in a block.
Here is the important detail in our capture: both balances already read 5, but Unlocked still reads 0. On the right, the incoming rows show +5 SFT and +5.0000 SFX, with incoming arrows and pending indicators. The coins are visible; they are not yet available for a new payment.
Mempool can also show other people’s network activity. Identify your payment using the wallet’s incoming marker and the transaction reference from your claim. In this walkthrough, the Cash reference begins 87cd9a23 and ends 507457; the Token reference begins 08c5a84e and ends d51c67.
6. Follow the same payments into History
After the payments are included in a block, select History. An entry leaving Mempool can simply mean it has moved to this next stage. It does not, by itself, mean the coins disappeared.
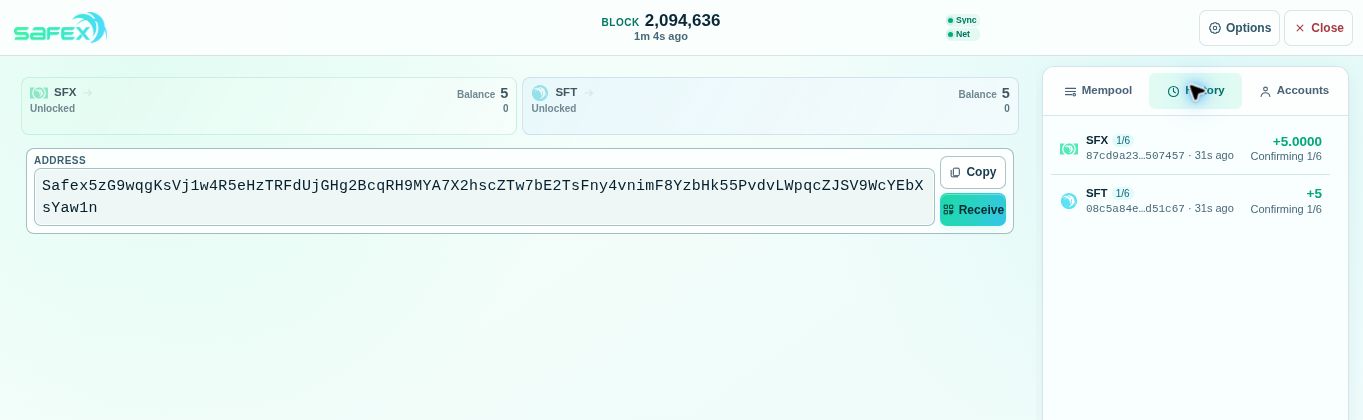
The real incoming History shows +5.0000 SFX and +5 SFT, with the same payment references. At this point, the wallet displayed Confirming 1/6. The first number counts progress toward the target shown by that screen.
| What you see | What it tells you |
|---|---|
| Incoming payment in Mempool | The wallet has identified a pending payment. |
| Incoming entry in History with confirmations | The payment has been included in the chain and is progressing through confirmations. |
| Unlocked amount available | The wallet considers those coins usable for a new outgoing payment. |
There is no fixed number of minutes to promise. Blocks and service updates do not arrive on a precise schedule. Let the wallet catch up and read Unlocked before trying to send.
The finish: both payments are Available
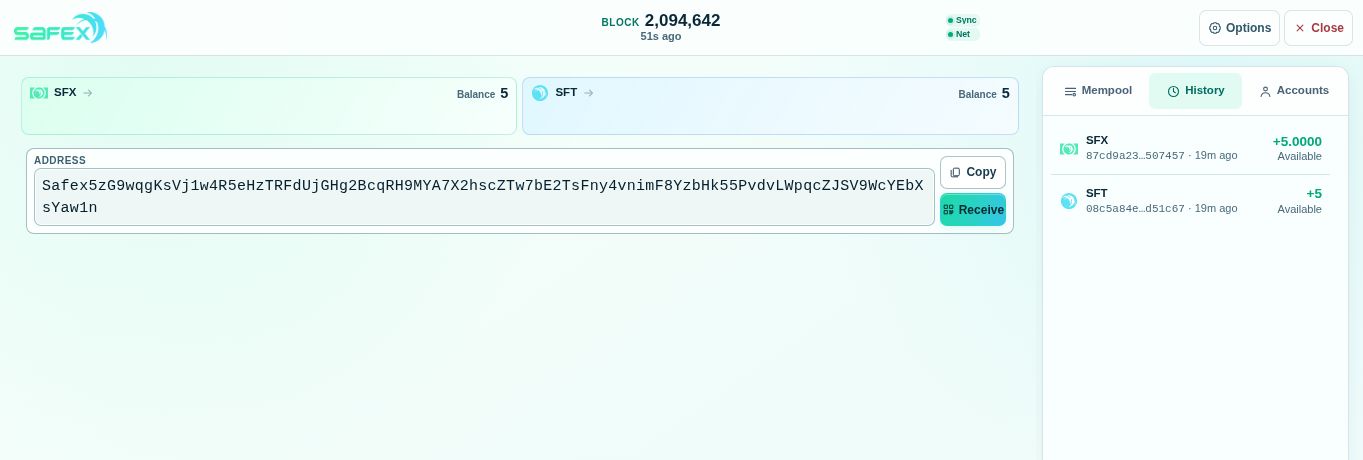
We kept following the same wallet until both History rows changed to Available. The balances remained 5 SFX and 5 SFT, and the balance controls became usable for sending. The separate Unlocked 0 line was no longer shown. This is the wallet’s finished receiving state for our two payments.
You have received your first coins
You should now know where your receiving address lives, where your recovery backup is kept, and how to match the faucet’s two payments to the wallet’s incoming activity. Check both SFX and SFT; looking at only one balance can hide half the result.
If you missed the pending stage, check History first. If only one asset has arrived, keep following the original claim. If the wallet is still synchronizing, let it finish before deciding that a payment is missing. Repeated claims will not make an existing payment confirm faster.
Continue with Part 2: Open your Safex wallet again and use your coins.