Wallet tutorials · 6 MIN READ
Open your Safex wallet again and use your coins
Restore the same wallet from a saved backup, understand the available balance, and check a payment before sending it.
 Daniel Dabek · September 27, 2026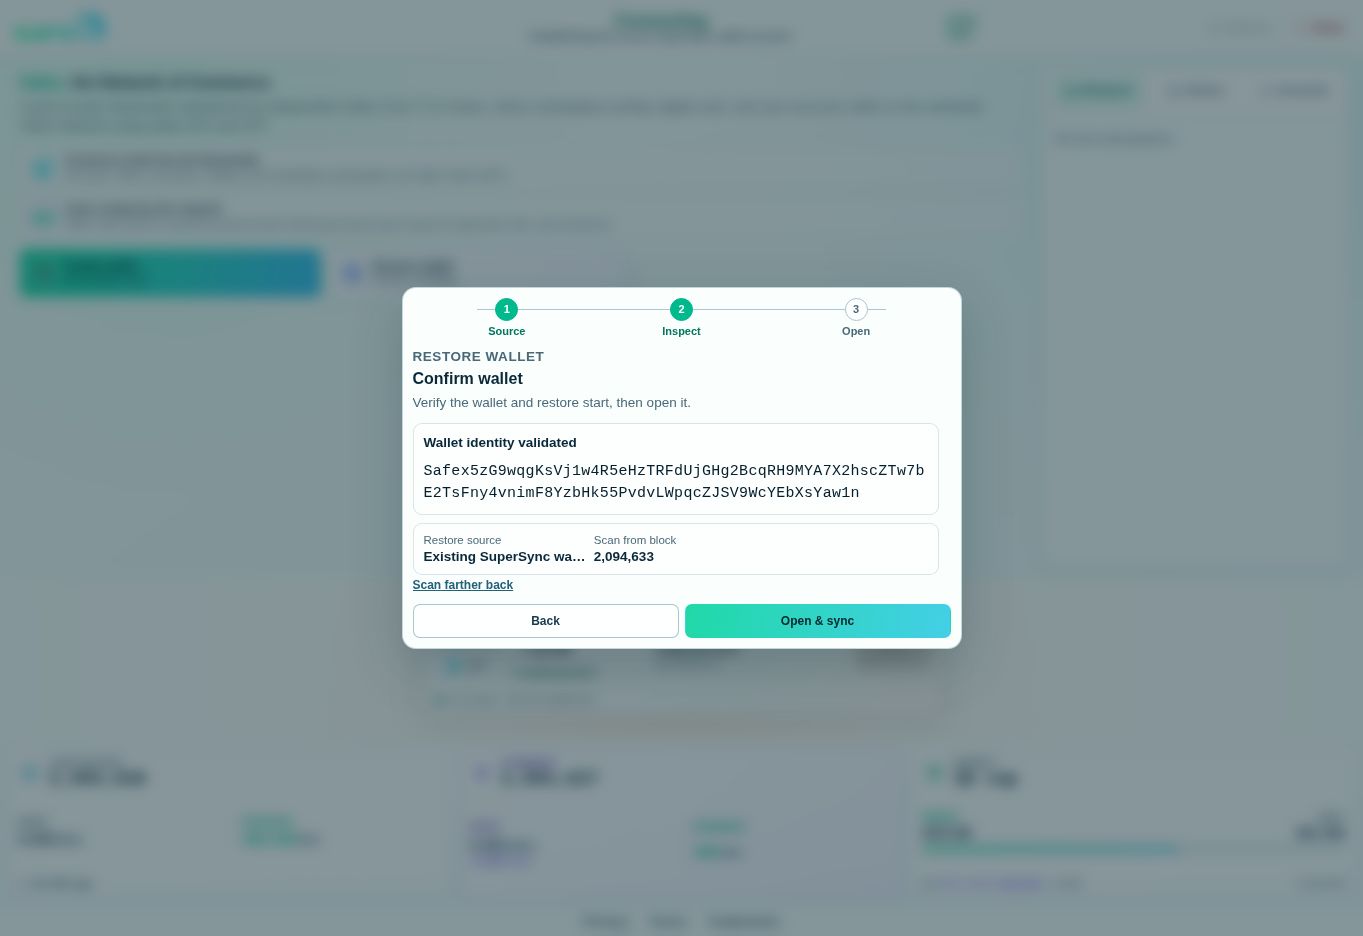
After receiving your first coins in Part 1, the next useful skill is returning to the same wallet. You will use a saved recovery method, compare the restored address, and check the incoming payments you already know. Then you can learn the checks to make before sending.
Restore the wallet you already own
Open safex.org and choose Restore wallet. Do not choose Create wallet to recover an old balance: that produces a different address.
The restore screen offers Backup, SWIF, Spend key, and Mnemonic. Choose the method that matches what you saved.
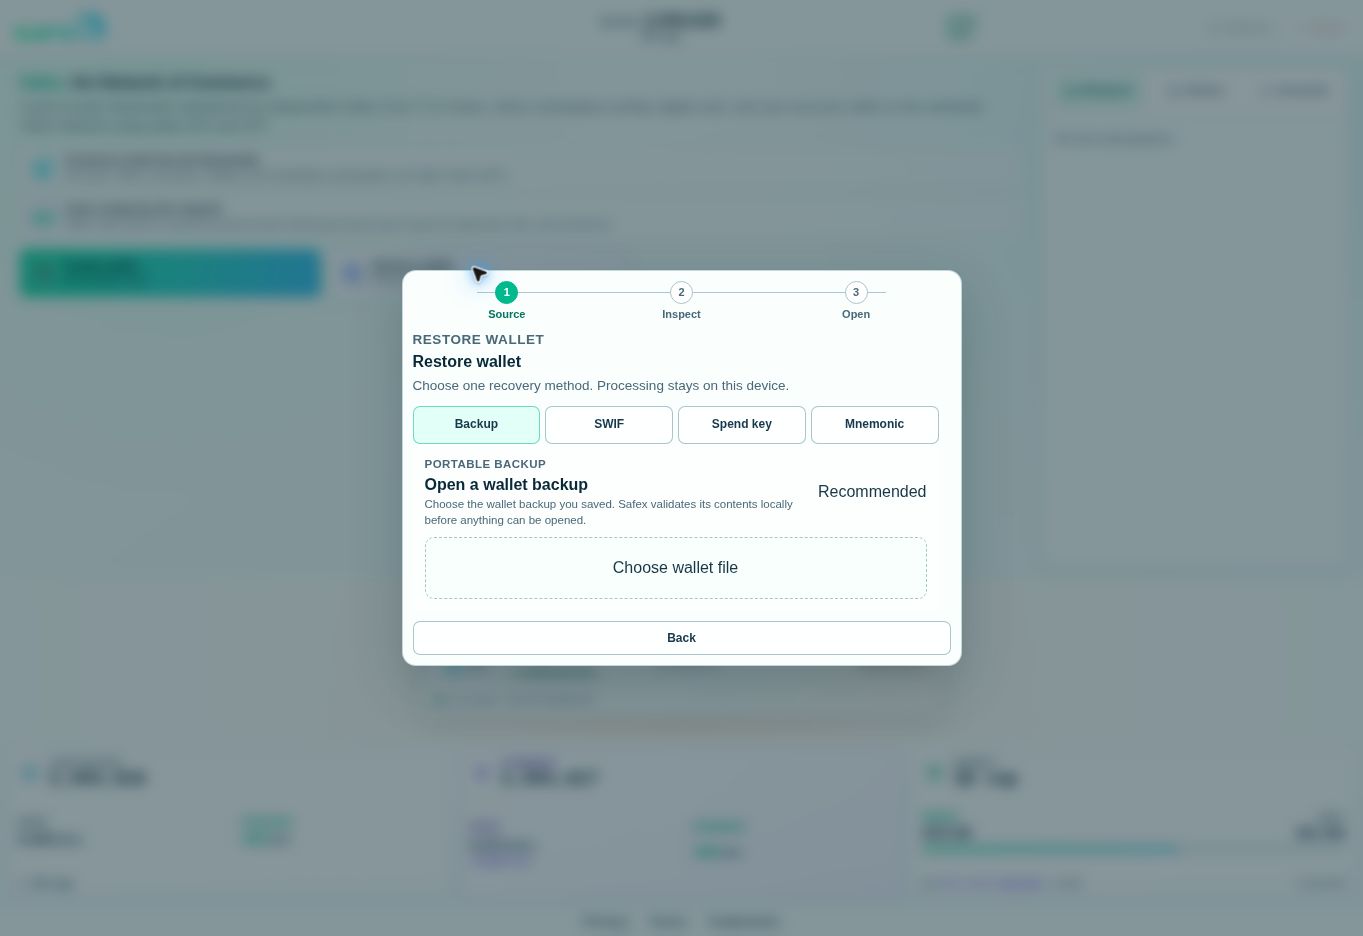
For a portable wallet file, choose Backup, then Choose wallet file. Select your .safexwallet.json file and supply its original password when asked. A new password cannot unlock a file encrypted with a different one.
For SWIF, paste your saved recovery value into the SWIF field and choose Inspect recovery when it becomes available. For Mnemonic, use your own 25 recovery words in their original order. Work privately and keep those values out of screenshots and messages.
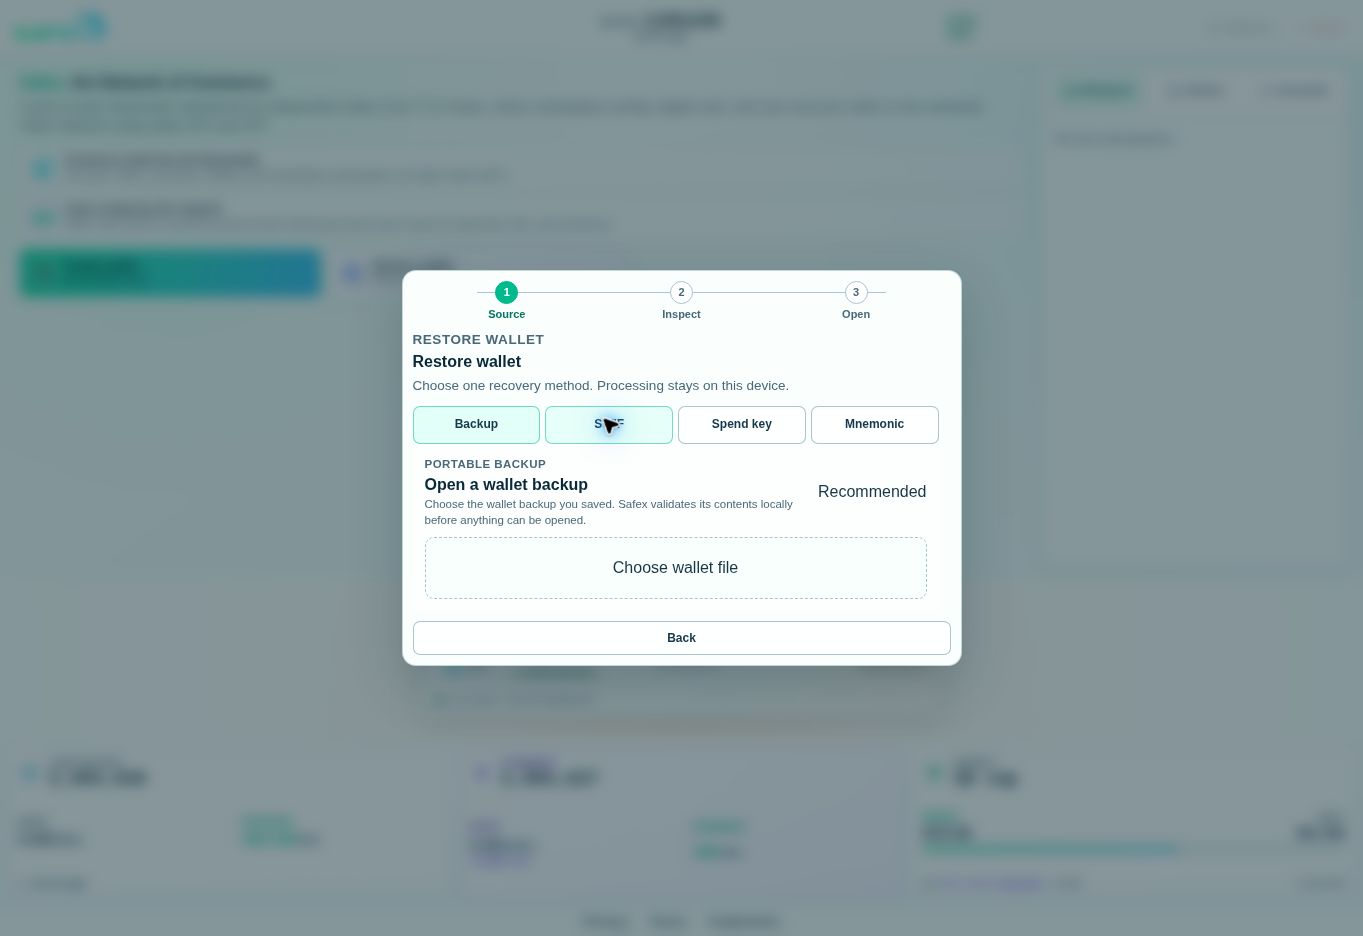
The example field is intentionally empty. You should never copy recovery material from a tutorial and treat that wallet as your own.
Compare the address, then open and sync
The Confirm wallet screen displays Wallet identity validated and the recovered public address. Compare it with the address you saved before receiving coins. The complete address should match.
In this demonstration, the saved SWIF reopened the same wallet: the address, both balances, and the two incoming History references all matched. Select Open & sync after the identity is correct. Let the wallet finish catching up before judging whether its balance or History is complete.
The screen also shows the starting point for the scan and a Scan farther back option. Do not copy the example block number into an older wallet. If a restored wallet is missing older activity, its scan start is one thing to check.
If you see Wallet already open — Close the other tab, then retry, the same wallet is already active elsewhere in this browser. First make sure your recovery copy is usable. Close that other open wallet, then use Retry connection in the restored one. This is the message encountered during this walkthrough.
Check the receipt you already know
Select History and look for the incoming SFX and SFT payments from the first guide. Match each payment’s asset, amount, and transaction reference. A matching address plus the same incoming activity is a much stronger check than recognizing the layout of the wallet.
Keep your backup after a successful restore. Opening the wallet on a new device does not replace the need for a recovery copy outside that device.
Read Balance and Unlocked separately
Balance shows the amount identified in the wallet. Unlocked tells you what is currently available for a new payment. Immediately after our faucet claim, the wallet showed balances of 5 SFX and 5 SFT while both unlocked amounts were zero.
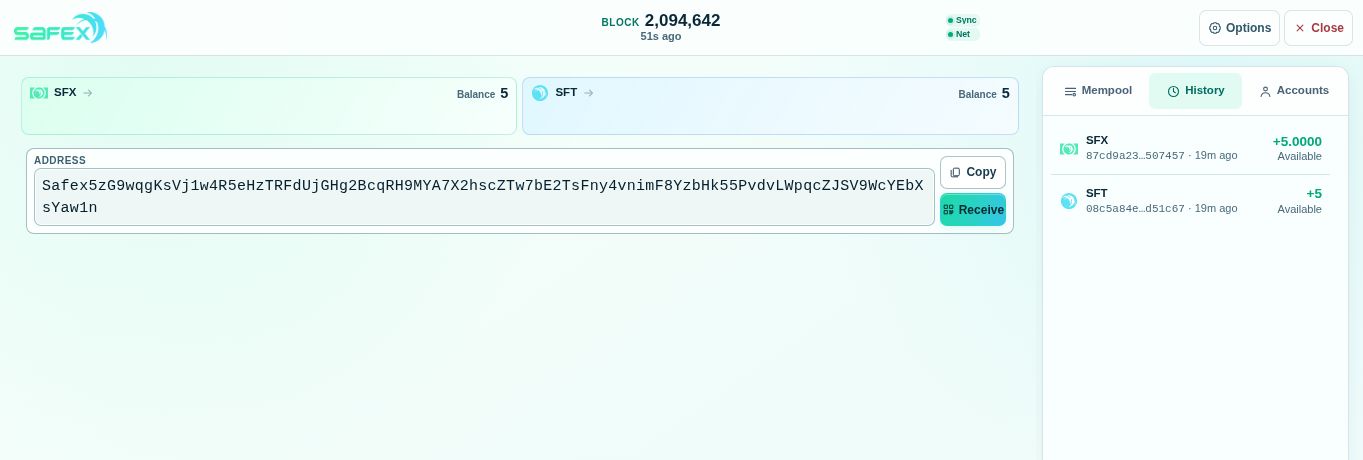
In the final screenshot, both incoming History entries read Available. The wallet has stopped showing the separate Unlocked 0 line, and both balance controls are enabled.
If sending is unavailable, read the status and let synchronization or confirmations progress. A disabled payment control is not an instruction to make a new wallet or claim again.
Prepare a payment carefully
When the wallet permits sending, select the SFX or SFT balance panel at the top. This opens Send SFX or Send SFT. SFX is Safex Cash and SFT is Safex Token. Both use the same address format, so the destination alone does not tell you which asset you are sending.
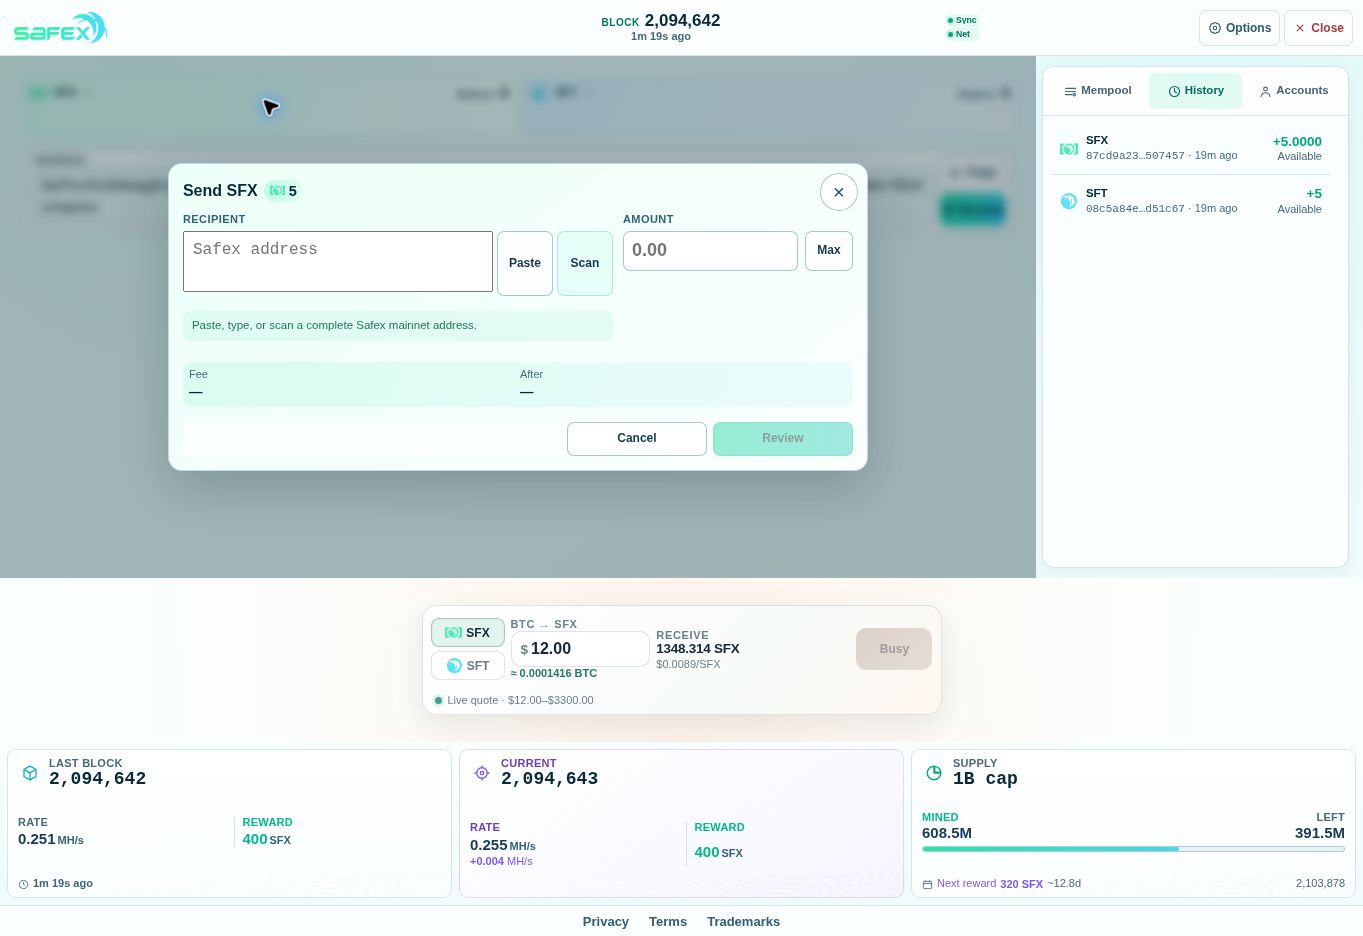
Get the public receiving address directly from the intended recipient and paste it into Recipient. Compare it with the original. Enter the quantity in Amount. Check the Fee and After preview; After is the balance you will retain. When the form is complete, select Review and check four things separately:
| Check | What to verify |
|---|---|
| Recipient | The exact address supplied by the intended recipient. |
| Asset | SFX or SFT, as intended. |
| Amount | The quantity the recipient should receive. |
| Fee and remaining balance | The network fee and what will remain afterward. |
Safex Cash pays network fees, including when sending Token. Read the actual fee preview; a fee from an older screenshot is not a promise. For a new recipient, a small agreed test payment can help verify the route before a larger transfer.
Approve only when the review matches your intention. A blockchain payment may be irreversible. Submit once and retain the resulting transaction ID. The recipient can then follow it through incoming activity, just as you did with the faucet.
If the screen freezes after sending
Do not immediately send the same payment again. A missing screen update does not prove that the transaction failed. Check History and pending activity using the asset, amount, recipient, time, and transaction reference to identify the original attempt. Repeating a successful payment creates a second payment.
After a payment, some remaining coins may temporarily be unavailable. Check Unlocked and the wallet’s status before trying to send again.
A useful help request contains references, not secrets
If you need help, keep the public claim or transaction reference, the asset, the approximate time, and the exact error message. Exclude recovery words, SWIF, private keys, and wallet-file passwords.
The receiving and backup-inspection screenshots in these guides are from the real walkthrough. No outgoing payment was made for this tutorial. You can review these checks without sending coins simply to complete a lesson.